Install OLVM and configure it as a compute resource for orcharhino
Oracle Linux Virtualization Manager (OLVM) is an open source virtualization platform based on oVirt. It offers a flexible and powerful solution for managing virtualization resources. But what if you could use this power even more efficiently? This is exactly where orcharhino comes into play! With orcharhino as your central control center, you can manage your OLVM infrastructure even more seamlessly and automatically thanks to official support.
In this guide, we will show you step by step how to set up OLVM as a “hosted engine” for test purposes and integrate it into orcharhino. This allows you to combine the strengths of both systems and maximize your efficiency when managing and provisioning virtual machines.
oVirt vs OLVM
OLVM is based on oVirt, but in contrast to the oVirt project, Oracle has carefully selected the packages and dependencies under Oracle Linux, provided them with clean version pinning and improved the Ansible role (installer script) in many places. In our tests, this led to a successful installation without bugs or error messages. Tests on other Enterprise Linux distributions and even the official “oVirt Node ISOs” have shown that it can be done differently and can be very complicated. Even with manual hacks such as manual appliance installation of the latest version, fixing outdated yum package sources, workarounds for various bugs and many hours of troubleshooting, oVirt simply would not install. This may be due to the fact that oVirt has not been actively developed for some time.
Prerequisites
- An existing orcharhino installation (version 6 or higher)
- Oracle Linux VMs can be provisioned in orcharhino (https://docs.orcharhino.com/or/docs/sources/guides/oracle_linux.html)
- a logical network for the oVirt environment in orcharhino
- DNS and DHCP provided by orcharhino for oVirt
- 200 GB free disk space, SSD recommended
- Basic knowledge of Linux and virtualization technologies
Configure orcharhino and prepare for OLVM installation
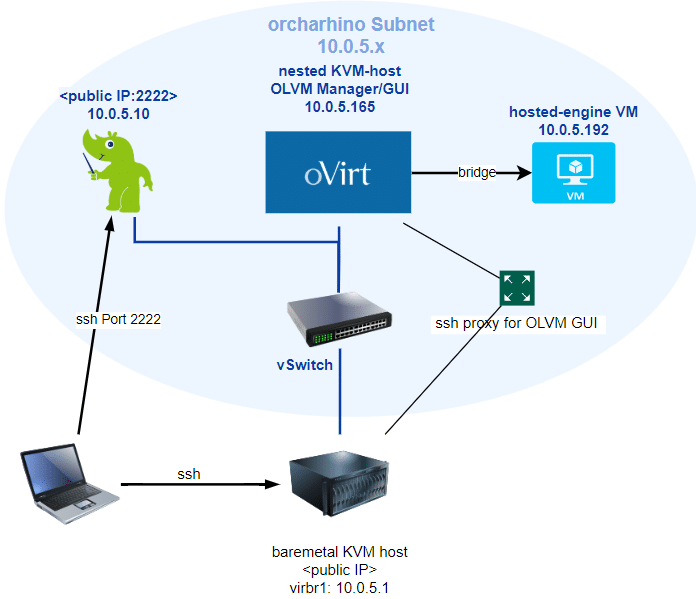
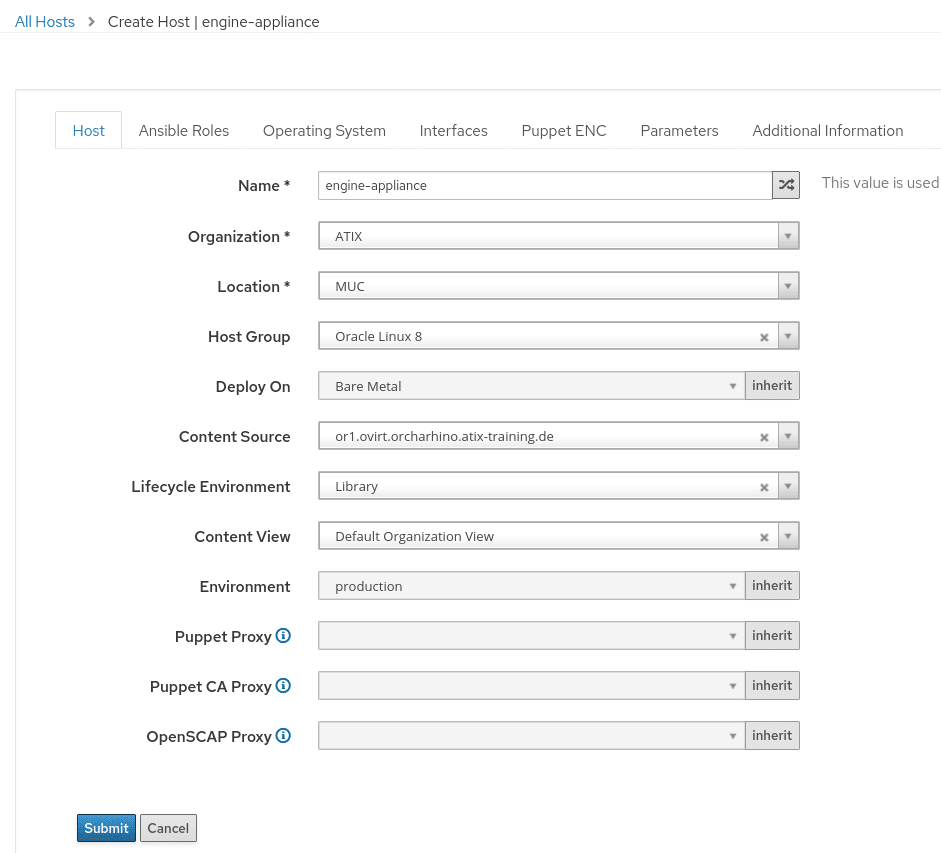
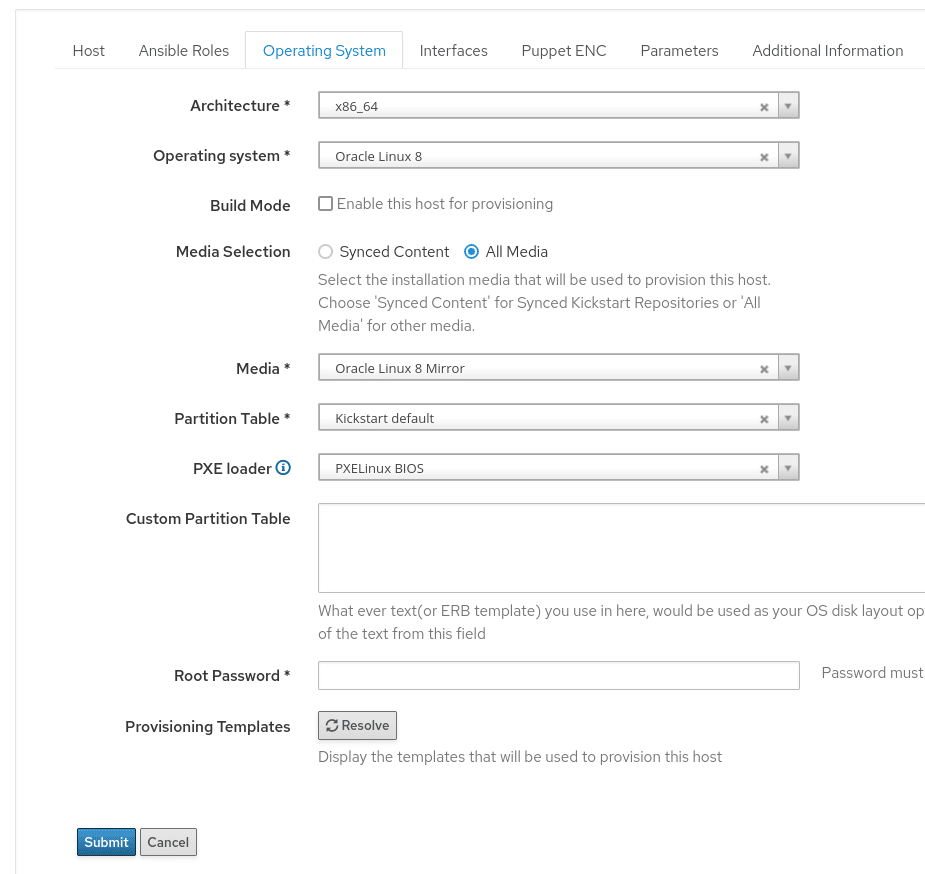
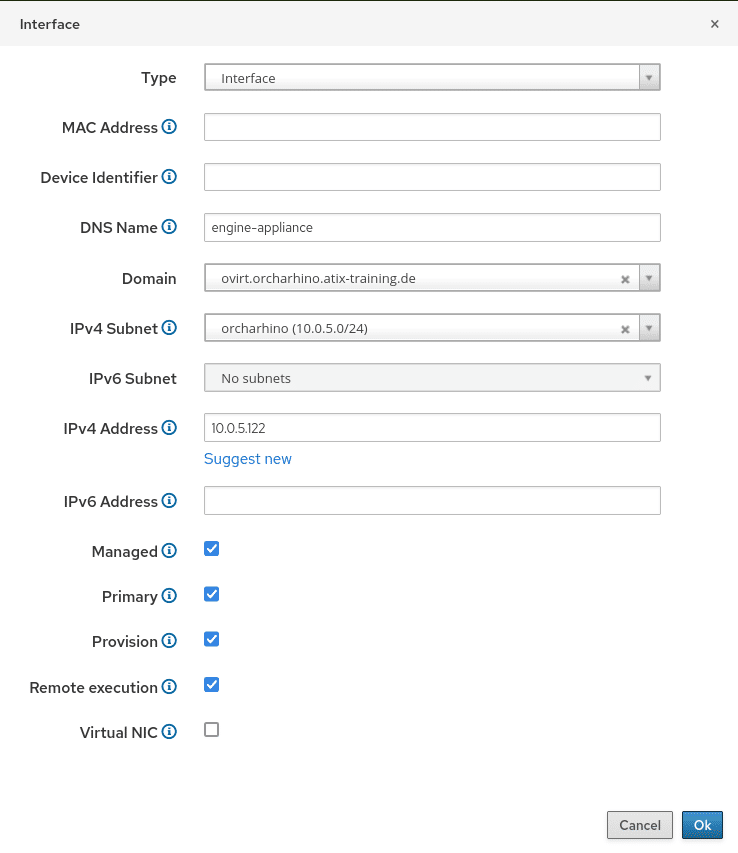
We create a new entry for the nested KVM host on which the oVirt Hosted Engine appliance will later run. The OLVM installer already requires DNS entries and DHCP leases during installation.
orcharhino GUI: Hosts → Create Host
After the installation, we start the VM and log in as root via SSH.
Installation of OLVM as a hosted engine
As mentioned at the beginning, oVirt could not be installed in our tests either as a “Node ISO” or on a fresh CentOS / Rocky Linux / Alma Linux 8 or 9. We therefore advise against installing the upstream product and recommend the oVirt-based OLVM. Oracle offers Enterprise Support for this on request.
Oracle Linux Virtualization Manager – Oracle Linux Virtualization Manager Documentation
ssh root@engine-appliance
Prepare storage: As an example, we create an NFS share on the Engine host with this bash script:
#!/bin/bash
# Install NFS utilities
dnf install nfs-utils -y
# Enable necessary services
systemctl enable nfs-server
systemctl enable rpcbind
# Add kvm group with GID 36 and vdsm user with UID 36 to the kvm group
groupadd kvm -g 36
useradd vdsm -u 36 -g kvm
# Create /storage directory and set permissions
mkdir /storage
chmod 0755 /storage
chown 36:36 /storage/
# Configure NFS exports
echo "/storage *(rw)" > /etc/exports
# Restart NFS-related services
systemctl restart rpcbind
systemctl restart nfs-server
# Export the NFS file systems
exportfs
echo "NFS storage setup completed."
We choose the “Self-Hosted Engine Deployment” installation method, in which the engine is installed as a VM on the same KVM host as the Oracle Linux Virtualization Manager. In our case, this is a nested VM, as we are also virtualizing the KVM host. This installation is well suited for test purposes where performance is not the main focus. For production environments with many VMs, the “standalone engine” variant is recommended.
Instructions: Getting Started
During the installation (hosted-engine --deploy --4) some values are queried. the following non-defaults should be entered:
RAM: 8192
FQDN: engine-appliance.ovirt.orcharhino.atix-training.de [FQDN of the VM as in orcharhino]
MAC: [MAC address of the engine-appliance VM from the orcharhino GUI]
storage path: engine-appliance.ovirt.orcharhino.atix-training.de:/storage [NFS-Share Pfad]
The installer takes quite a while, as it is a large Ansible role.
The successful installation is finally acknowledged with “Hosted Engine successfully installed”. Optionally, we can save the status as a snapshot via the orcharhino GUI.
Connection tests:
# SSH auf die orchahrino VM (Port 2222)
ssh root@ -p 2222
# SSH weiter auf die engine-appliance VM (IP oder hostname)
ssh engine-appliance
# SSH weiter auf auf die neue engine-VM
ssh engine
We should be able to log in to the new Engine VM with the assigned root-PW.
$ cat ~/.ssh/config
Host hetzner
 HostName
 User root
 IdentityFile
Host orchahrino
 HostName
 Port 2222
 User root
 IdentityFile
Host engine-appliance
 HostName engine.ovirt.orchahrino.atix-training.de
 User root
 IdentityFile
 ProxyJump root@orchahrino
Configure oVirt Engine
After the hosted-engine installer has run, we need to set up our environment in order to access the OLVM web GUI for further configuration.
One approach is a SOCKS5 proxy in conjunction with dynamic port forwarding.
-
-
proxy.pac file:
-
-
Example:
-
function FindProxyForURL(url, host){
  if ( dnsDomainIs(host,"engine-appliance.ovirt.orchahrino.atix-training.de") ) {
      return "SOCKS5 127.0.0.1:8443" ;
  }
  alert("no proxy used");
  return "DIRECT";
}
Firefox konfigurieren: Settings → General → Network Settings → Settings → Automatic Proxy Configuration URL-> file:///home/alex/proxy.pac → reload → OK
Das funktioniert auch unter Google Chrome. -
- SSH Dynamic Port Forwarding:
-
# Connection offen lassen
ssh engine-appliance -D 8443
-
-
-
Call up engine URL in the browser: https://engine-appliance.ovirt.orchahrino.atix-training.de/ovirt-engine/
-
-
Administration Portal → log in with admin@ovirt and the selected password
Data Center, Host and Storage Domain should be listed.
orcharhino: Configure oVirt Compute Resource
To activate the oVirt plugin for orcharhino, we log in via SSH:
# orchahrino-installer --enable-foreman-compute-ovirt
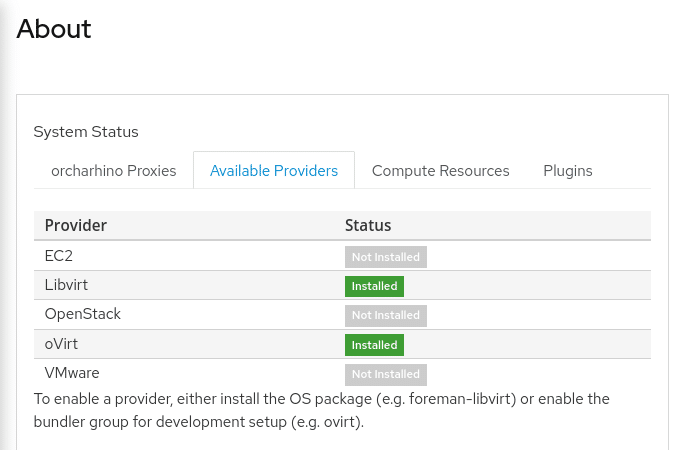
In the orcharhino GUI under Administer → About in the “Available Providers” tab, oVirt should now show the status “installed”:
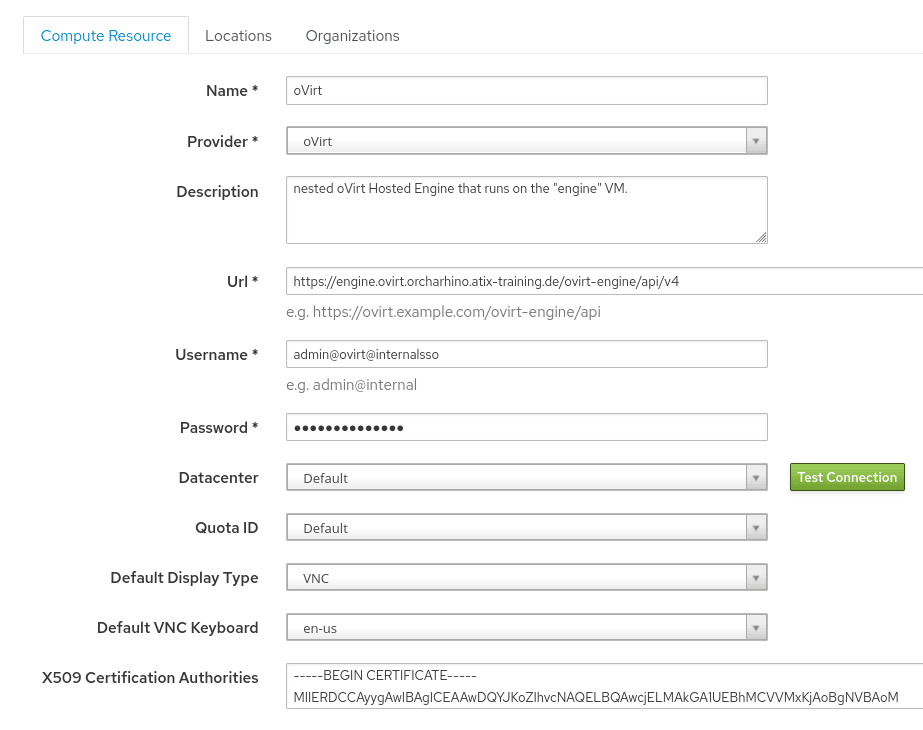
Now we can connect the engine in orcharhino via oVirt Compute Resource:
Provisioning virtual machines on oVirt – orcharhino documentation
To do this, we navigate to Infrastructure > Compute Resources in the orcharhino GUI and click on Create Compute Resource.
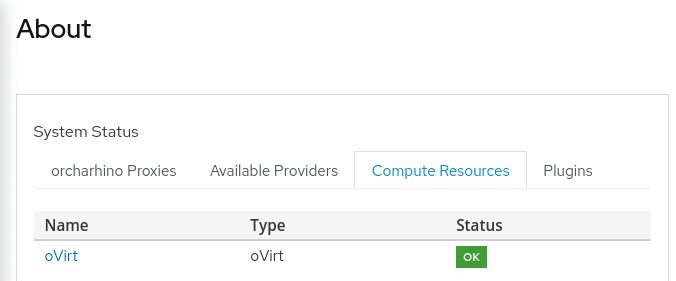
The compute resource is now ready for use:
With the next “create Host” we can now use oVirt as a compute resource.
oVirt is now part of the orcharhino ecosystem!


